1.安裝路由系統
NPM
npm install vue-router
2.在main.js中進入引用
import VueRouter from 'vue-router'
3.創建三個空的組件:
Vcourse.vue


<template>
<div class="course">課程
</div>
</template><script>export default {name: "vcourse",data(){return {}}}
</script><style scoped></style>
vue router-link,Vmain.vue
<template>
<div class="course">課程
</div>
</template><script>export default {name: "vcourse",data(){return {}}}
</script><style scoped></style>
Vmarked.vue
<template>
<div class="course">課程
</div>
</template><script>export default {name: "vcourse",data(){return {}}}
</script><style scoped></style>
4.在main.js中引入這三個組件
//引入的三個組件
//定義路由組件。可以從其他文件 import過來
import Vmain from './components/Vmain'
import Vcourse from './components/Vcourse'
import Vmarked from './components/Vmarked'
5.使用vuerouter.use()方法
Vue.use(VueRouter);
6.定義我們的路由對象:
//定義我們的路由對象,每一個路由映射一個組件
const router = new VueRouter({mode:'history',routes:[{path:'/',component:Vmain},{path:'/course',component:Vcourse},{path:'/mark',component:Vmarked}]
});
7.掛載
//4 創建和掛載實例
new Vue({el: '#app',router,render: h => h(App)
});
8.渲染
<div class="app"><link href="https://cdnjs.cloudflare.com/ajax/libs/twitter-bootstrap/3.3.7/css/bootstrap.min.css" rel="stylesheet"><ul><li><router-link to="/">首頁</router-link></li></ul><ul><li><router-link to="/course">課程</router-link><button class="btn-success">88888</button></li></ul><ul><li><router-link to="/mark">編輯器</router-link></li></ul><!--路由出口--><!--路由匹配到的組件將渲染在這里--><router-view></router-view></div>
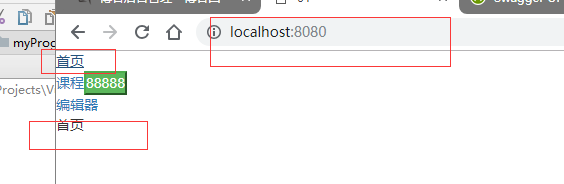
這里把router-link渲染成了a標簽,to渲染成了href.
這樣一個單頁面應用就出來了。
效果就是點擊三個a標簽,分別加載不同的組件,而頁面不會刷新,路由在更新。

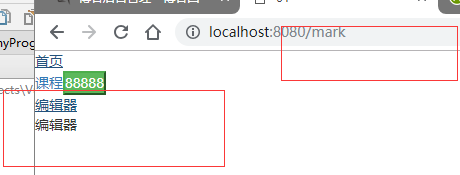
?
?那個888,是在最后測試了一下bootstrap的 button,看bootstrap導入了沒有。
最后附上所有的全部代碼:
app.vue
<!-- 一個組件由三部分組成 -->
<template><!-- 頁面的結構 --><div class="app"><link href="https://cdnjs.cloudflare.com/ajax/libs/twitter-bootstrap/3.3.7/css/bootstrap.min.css" rel="stylesheet"><ul><li><router-link to="/">首頁</router-link></li></ul><ul><li><router-link to="/course">課程</router-link><button class="btn-success">88888</button></li></ul><ul><li><router-link to="/mark">編輯器</router-link></li></ul><!--路由出口--><!--路由匹配到的組件將渲染在這里--><router-view></router-view></div>
</template><script>//頁面的業務邏輯
  export default {name: 'app',data() {       //data必須是一個函數return {    //必須return。
        msg:"hello"}},}
</script><style scoped>*{padding: 0;margin: 0;}
</style>
main.js
import Vue from 'vue'
import App from './App.vue'
import VueRouter from 'vue-router'//引入的三個組件//定義路由組件。可以從其他文件 import過來import Vmain from './components/Vmain'import Vcourse from './components/Vcourse'import Vmarked from './components/Vmarked'Vue.use(VueRouter);//定義我們的路由對象,每一個路由映射一個組件
const router = new VueRouter({mode:'history',routes:[{path:'/',component:Vmain},{path:'/course',component:Vcourse},{path:'/mark',component:Vmarked}]
});//4 創建和掛載實例
new Vue({el: '#app',router,render: h => h(App)
}); 三個組件代碼在上面已有。其實就是三個空模板。
?