?
?
?
?
通過注解實現ServiceImpl業務
一、使用@Component裝配Bean
1、 定義類:User
在類上面加@Component注解,在屬性上面加@Value值
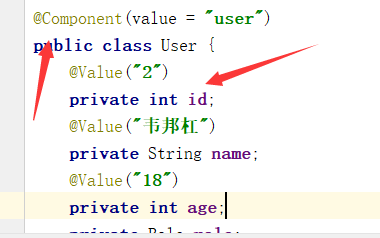


package com.wbg.springxmlbean.entity;import org.springframework.beans.factory.annotation.Value;
import org.springframework.stereotype.Component;@Component(value = "user")
public class User {@Value("2")private int id;@Value("韋邦杠")private String name;@Value("18")private int age;private Role role;@Overridepublic String toString() {return "User{" +"id=" + id +", role=" + role +", name='" + name + '\'' +", age=" + age +'}';}public Role getRole() {return role;}public void setRole(Role role) {this.role = role;}public int getId() {return id;}public void setId(int id) {this.id = id;}public String getName() {return name;}public void setName(String name) {this.name = name;}public int getAge() {return age;}public void setAge(int age) {this.age = age;}}
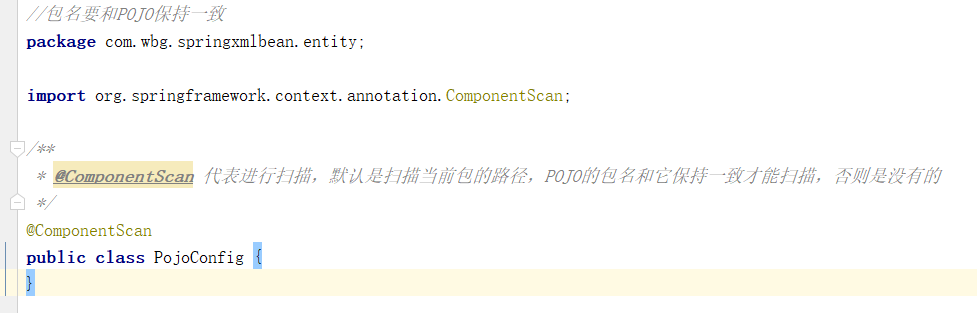
?2、使用@ComponentScan注解進行掃描包的路徑
springMVC注解,創建一個類,類上面加@CompontScan注解
測試:
ApplicationContext context=new AnnotationConfigApplicationContext(PojoConfig.class);User user=context.getBean(User.class);System.out.println(user);
spring注解實現原理。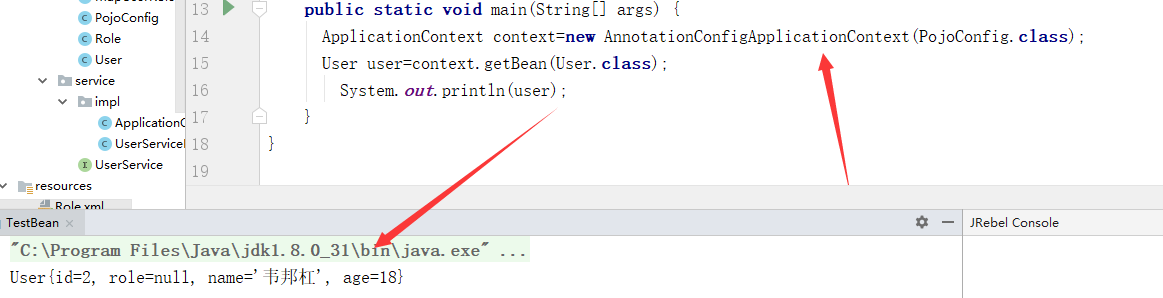
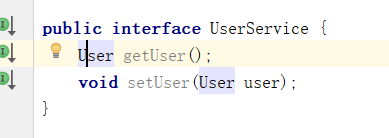
3、創建UserService接口
public interface UserService {User getUser();void setUser(User user);
}
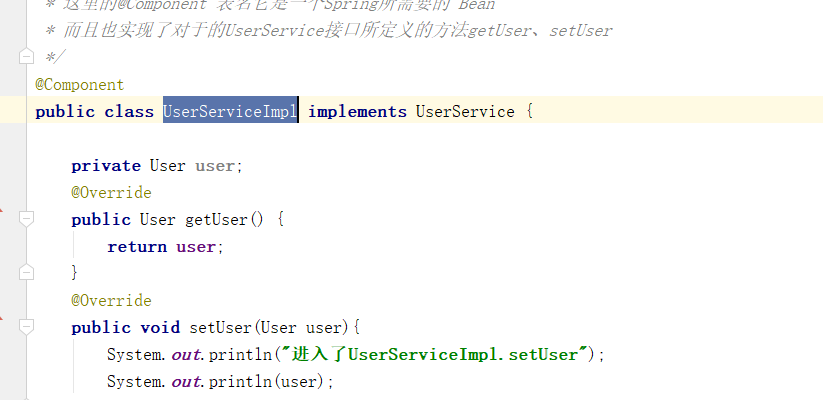
4、創建實現類UserServiceImpl,在該類上面使用@Component注解
package com.wbg.springxmlbean.service.impl;import com.wbg.springxmlbean.entity.User;
import com.wbg.springxmlbean.service.UserService;
import org.springframework.stereotype.Component;/*** 這里的@Component 表名它是一個Spring所需要的 Bean* 而且也實現了對于的UserService接口所定義的方法getUser、setUser*/
@Component
public class UserServiceImpl implements UserService {private User user;@Overridepublic User getUser() {return user;}@Overridepublic void setUser(User user){System.out.println("進入了UserServiceImpl.setUser");System.out.println(user);}
}
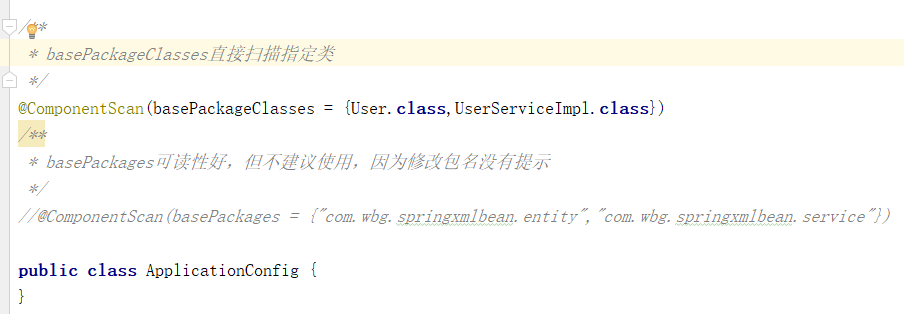
5、配置@ComponentScan制定包掃描
spring 自定義注解?創建一個ApplicationConfig類,該類上面使用@ComponentScan注解
package com.wbg.springxmlbean.service.impl;import com.wbg.springxmlbean.entity.User;
import org.springframework.context.annotation.ComponentScan;/*** basePackageClasses直接掃描指定類*/
@ComponentScan(basePackageClasses = {User.class,UserServiceImpl.class})
/*** basePackages可讀性好,但不建議使用,因為修改包名沒有提示*/
//@ComponentScan(basePackages = {"com.wbg.springxmlbean.entity","com.wbg.springxmlbean.service"})public class ApplicationConfig {
}
?
測試:
ApplicationContext context=new AnnotationConfigApplicationContext(ApplicationConfig.class);User user=context.getBean(User.class);UserService userService=context.getBean(UserService.class);userService.setUser(user)
spring是如何處理注解的?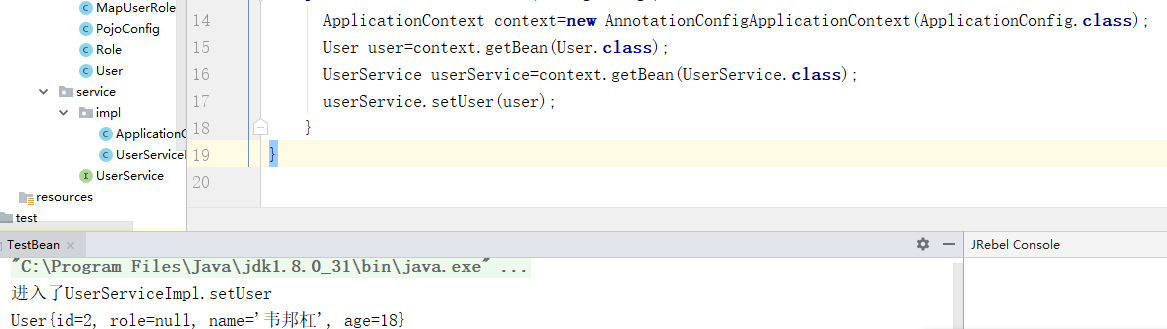
?
二、自動裝配-@Autowired
eneity的Role類:
package com.wbg.springxmlbean.entity;import org.springframework.beans.factory.annotation.Value;
import org.springframework.stereotype.Component;@Component
public class Role {@Value("1")private int id;@Value("roleName_1")private String roleName;@Value("note_1")private String note;@Overridepublic String toString() {return "Role{" +"id=" + id +", roleName='" + roleName + '\'' +", note='" + note + '\'' +'}';}public int getId() {return id;}public void setId(int id) {this.id = id;}public String getRoleName() {return roleName;}public void setRoleName(String roleName) {this.roleName = roleName;}public String getNote() {return note;}public void setNote(String note) {this.note = note;}
}
spring元注解。service創建接口:RoleService?
package com.wbg.springxmlbean.service;public interface RoleService {void printRoleInfo();
}
impl實現類:RoleServiceImpl
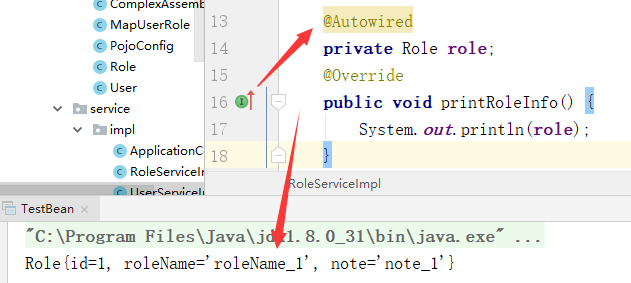
@Component
public class RoleServiceImpl implements RoleService {@Autowiredprivate Role role;@Overridepublic void printRoleInfo() {System.out.println(role);}
}
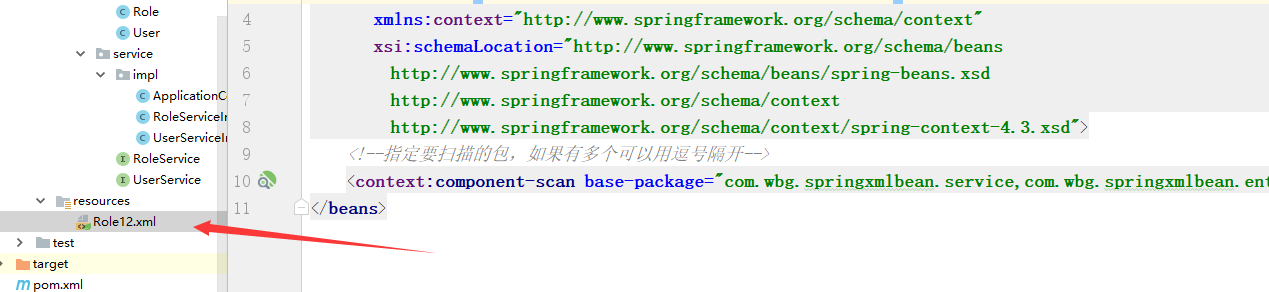
創建xml掃描:
<?xml version="1.0" encoding="UTF-8"?>
<beans xmlns="http://www.springframework.org/schema/beans"xmlns:xsi="http://www.w3.org/2001/XMLSchema-instance"xmlns:context="http://www.springframework.org/schema/context"xsi:schemaLocation="http://www.springframework.org/schema/beanshttp://www.springframework.org/schema/beans/spring-beans.xsdhttp://www.springframework.org/schema/contexthttp://www.springframework.org/schema/context/spring-context-4.3.xsd"><!--指定要掃描的包,如果有多個可以用逗號隔開--><context:component-scan base-package="com.wbg.springxmlbean.service,com.wbg.springxmlbean.entity"/>
</beans>
測試:
ApplicationContext context=new ClassPathXmlApplicationContext("Role12.xml");RoleService userService=context.getBean(RoleService.class);userService.printRoleInfo();
當有注解的時候
當沒有的時候

三、注解@Primary
?上面類:RoleServiceImpl實現了RoleService接口
再創建一個類RoleServiceImpl2進行實現RoleService接口
則RoleService接口就有兩個實現類,但Spring ioc不知道采用哪個注入,然后就會出錯
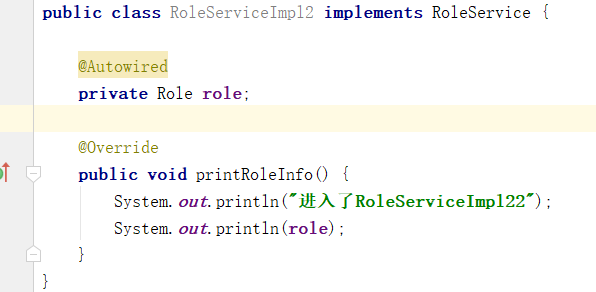
@Component
public class RoleServiceImpl2 implements RoleService {@Autowiredprivate Role role;@Overridepublic void printRoleInfo() {System.out.println("進入了RoleServiceImpl22");System.out.println(role);}
}
在啟動的時候報錯
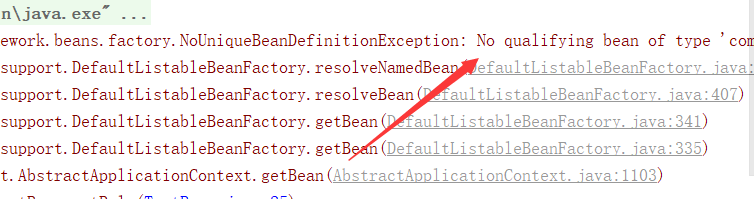
org.springframework.beans.factory.NoUniqueBeanDefinitionException: No qualifying bean of type 'com.wbg.springxmlbean.service.RoleService' available: expected single matching bean but found 2: roleServiceImpl,roleServiceImpl2
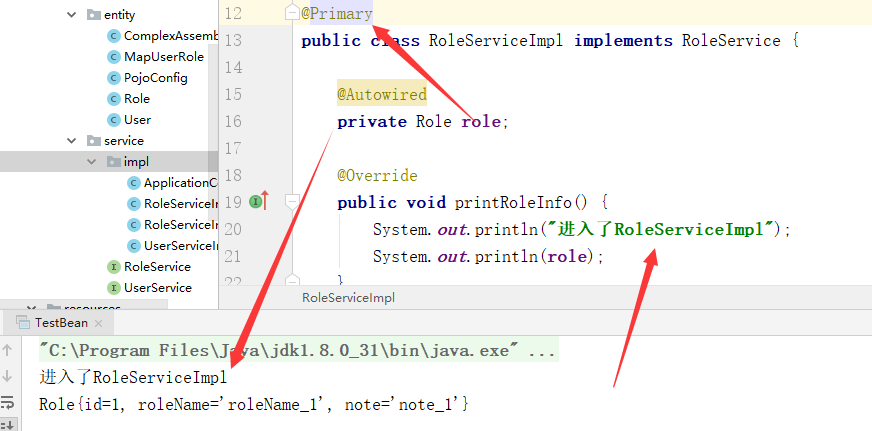
?通過@Primary注解告訴Sring ioc
測試:
1、RoleServiceImpl2

去掉RoleServiceImpl2上面的@primary注解
測試RoleServiceImpl
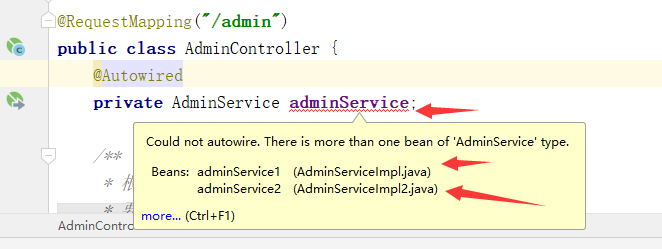
四、注解@Qualifier
?把上面的@Primary注解去掉,然后在Controller進行使用
現在接口AdminService有兩個實現類
AdminServiceImpl

AdminServiceImpl2
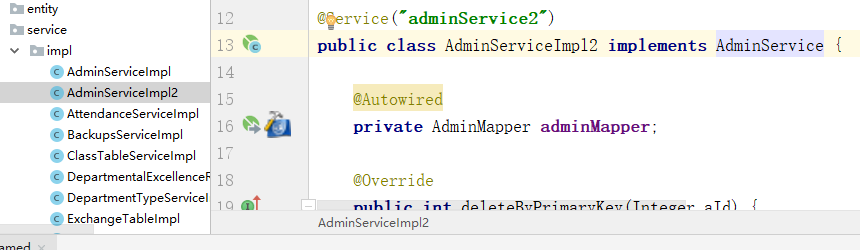
然后在Controller進行實現

?五、使用@Bean裝配Bean
?
@Bean的配置項中包含4個配置
name:是一個字符中數組,允許多個
autowire:標識是否是一個引用Bean對象,默認值:Autowire.NO
initMethd:自定義初始化方法
destroyMethod:自定義銷毀方法
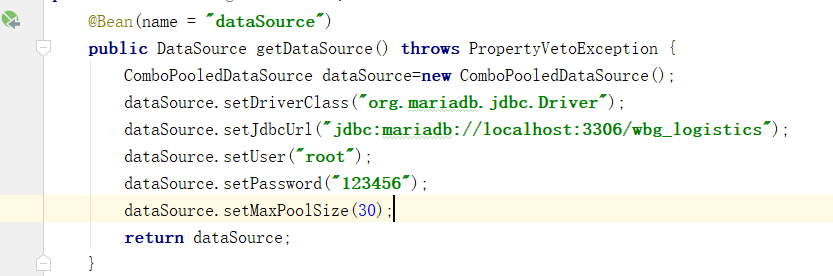
代碼:
package com.wbg.springxmlbean.spring;import com.mchange.v2.c3p0.ComboPooledDataSource;
import org.springframework.context.annotation.Bean;
import org.springframework.context.annotation.Configuration;import javax.sql.DataSource;
import java.beans.PropertyVetoException;
@Configuration
public class ConfigDataSource {@Bean(name = "dataSource")public DataSource getDataSource() throws PropertyVetoException {ComboPooledDataSource dataSource=new ComboPooledDataSource();dataSource.setDriverClass("org.mariadb.jdbc.Driver");dataSource.setJdbcUrl("jdbc:mariadb://localhost:3306/wbg_logistics");dataSource.setUser("root");dataSource.setPassword("123456");dataSource.setMaxPoolSize(30);return dataSource;}
}
實現:
接口:
public interface RoleDataSourceService {Role getRole(int id);
}
實現接口
package com.wbg.springxmlbean.service.impl;import com.wbg.springxmlbean.entity.Role;
import com.wbg.springxmlbean.service.RoleDataSourceService;
import com.wbg.springxmlbean.spring.ConfigDataSource;
import org.springframework.beans.factory.annotation.Autowired;
import org.springframework.stereotype.Component;
import java.beans.PropertyVetoException;
import java.sql.Connection;
import java.sql.PreparedStatement;
import java.sql.ResultSet;
import java.sql.SQLException;@Component
public class RoleDataSourceServiceImpl implements RoleDataSourceService {@AutowiredConfigDataSource dataSource=null;@Overridepublic Role getRole(int id) {Connection con=null;ResultSet rs=null;PreparedStatement ps=null;Role role=null;try {con=dataSource.getDataSource().getConnection();ps=con.prepareStatement("select * from role where id = ?");ps.setInt(1,id);rs=ps.executeQuery();while (rs.next()){role=new Role();role.setId(rs.getInt(1));role.setNote(rs.getString(2));role.setNote(rs.getString(3));}} catch (PropertyVetoException e) {e.printStackTrace();} catch (SQLException e) {e.printStackTrace();}return role;}}
這里Role12.xml需要掃描:
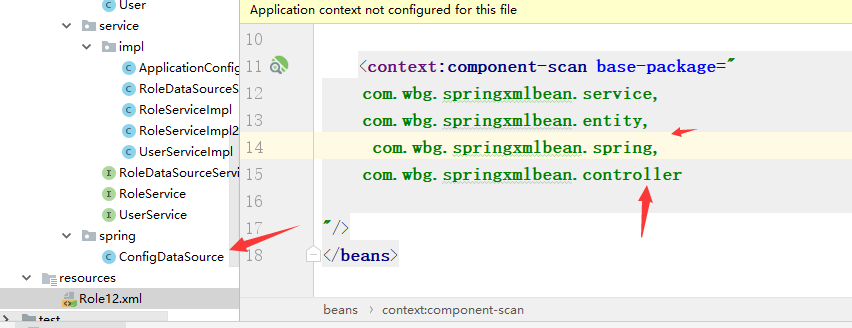
?
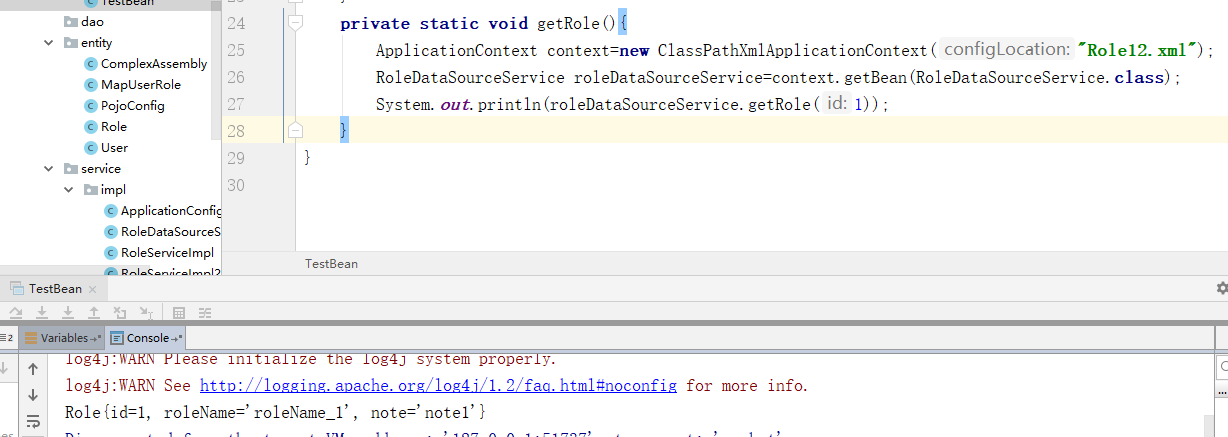
測試:
?
ApplicationContext context=new ClassPathXmlApplicationContext("Role12.xml");RoleDataSourceService roleDataSourceService=context.getBean(RoleDataSourceService.class);System.out.println(roleDataSourceService.getRole(1));
?
六、裝配的混合使用
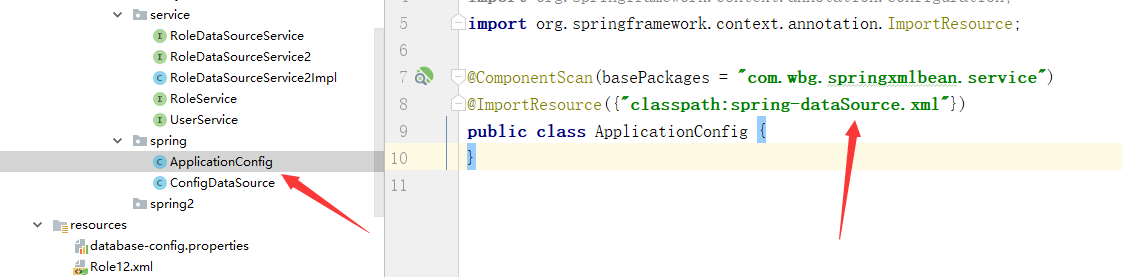
創建一個配置類:
@ComponentScan(basePackages = "com.wbg.springxmlbean.service")
@ImportResource({"classpath:spring-dataSource.xml"})
public class ApplicationConfig {
}
創建xml文件:
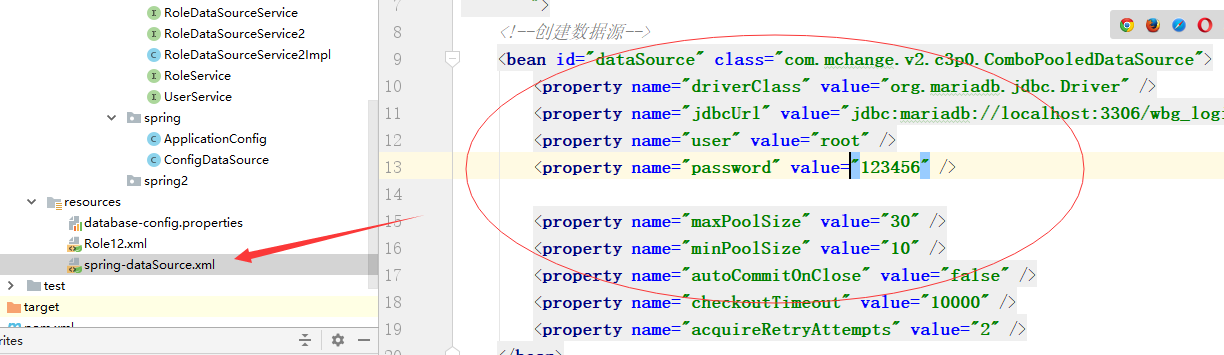
spring-dataSource.xml
<?xml version="1.0" encoding="UTF-8"?>
<beans xmlns="http://www.springframework.org/schema/beans"xmlns:xsi="http://www.w3.org/2001/XMLSchema-instance"xmlns:context="http://www.springframework.org/schema/context"xsi:schemaLocation="http://www.springframework.org/schema/beanshttp://www.springframework.org/schema/beans/spring-beans.xsd"><!--創建數據源--><bean id="dataSource" class="com.mchange.v2.c3p0.ComboPooledDataSource"><property name="driverClass" value="org.mariadb.jdbc.Driver" /><property name="jdbcUrl" value="jdbc:mariadb://localhost:3306/wbg_logistics" /><property name="user" value="root" /><property name="password" value="123456" /><property name="maxPoolSize" value="30" /><property name="minPoolSize" value="10" /><property name="autoCommitOnClose" value="false" /><property name="checkoutTimeout" value="10000" /><property name="acquireRetryAttempts" value="2" /></bean></beans>
創建接口:RoleDataSourceService2
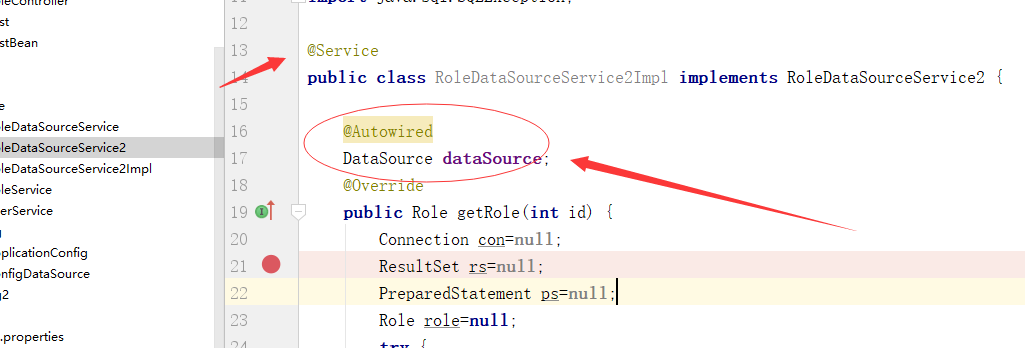
創建實現類:
使用注解@Autowired
package com.wbg.springxmlbean.service;import com.wbg.springxmlbean.entity.Role;
import org.springframework.beans.factory.annotation.Autowired;
import org.springframework.stereotype.Service;import javax.sql.DataSource;
import java.sql.Connection;
import java.sql.PreparedStatement;
import java.sql.ResultSet;
import java.sql.SQLException;@Service
public class RoleDataSourceService2Impl implements RoleDataSourceService2 {@AutowiredDataSource dataSource;@Overridepublic Role getRole(int id) {Connection con=null;ResultSet rs=null;PreparedStatement ps=null;Role role=null;try {con= dataSource.getConnection();ps=con.prepareStatement("select * from role where id = ?");ps.setInt(1,id);rs=ps.executeQuery();while (rs.next()){role=new Role();role.setId(rs.getInt(1));role.setRoleName(rs.getString(2));role.setNote(rs.getString(3));}}  catch (SQLException e) {e.printStackTrace();}return role;}
}
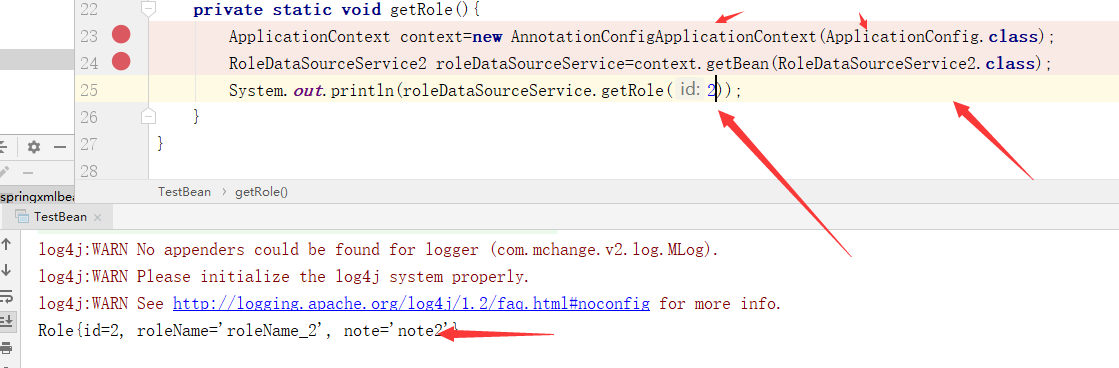
測試:
ApplicationContext context=new AnnotationConfigApplicationContext(ApplicationConfig.class);RoleDataSourceService2 roleDataSourceService=context.getBean(RoleDataSourceService2.class);System.out.println(roleDataSourceService.getRole(2));
?
?
?demo:https://github.com/weibanggang/springAnnotation.git
![Cisco IOS Unicast NAT 工作原理 [一]](http://blog.51cto.com/attachment/201009/201009301285776510901.jpg)