學習webpack
https://github.com/webproblem/learning-article#webpack
https://github.com/lengziyu/learn-webpack
先跟著下面這個例子來做一遍,因為版本原因如果你跟著原文可能會出錯,所以我會在這里修復原文中的錯誤,本文使用的是4.29.3版本
![]()
webpack如何使用、https://segmentfault.com/a/1190000006178770?utm_source=tag-newest
請結合官方文檔來進行學習
https://www.webpackjs.com/concepts/#%E5%85%A5%E5%8F%A3-entry-
https://webpack.js.org/configuration/dev-server#devserver
什么是webpack
webpack?是一個現代 JavaScript 應用程序的靜態模塊打包器(module bundler)。當 webpack 處理應用程序時,它會遞歸地構建一個依賴關系圖(dependency graph),其中包含應用程序需要的每個模塊,然后將所有這些模塊打包成一個或多個?bundle。
為什么使用webpack
webpack require,① 模塊化開發(import,require)
② 預處理(Less,Sass,ES6,TypeScript……)
③ 主流框架腳手架支持(Vue,React,Angular)
④ 龐大的社區(資源豐富,降低學習成本)
總之一句話,方便快捷便于我們快速的開發。
快速開始
根據整理的資料進行實際操作,并修正版本更新造成一些命令引發的錯誤,我用的工具是gitbash,平臺為windows平臺,安裝都只是安裝到項目文件夾中沒有進行全局安裝
創建空文件夾
$ mkdir webpack

$ cd webpack

$ mkdir {app,public}

$ ll
total 0
drwxr-xr-x 1 Administrator 197121 0 二月 13 13:23 app/
drwxr-xr-x 1 Administrator 197121 0 二月 13 13:23 public/
?
安裝webpack
進入文件根目錄,然后安裝webpack到此項目中,這個用的是淘寶鏡像,這樣可以加快安裝速度。
什么是webpack?npm指向淘寶鏡像
$ cnpm install --save-dev webpack
platform unsupported webpack@4.29.3 ? watchpack@1.6.0 ? chokidar@2.1.1 ? fsevents@^1.2.7 Package require os(darwin) not compatible with your platform(win32)
[fsevents@^1.2.7] optional install error: Package require os(darwin) not compatible with your platform(win32)
√ Installed 1 packages
√ Linked 267 latest versions √ Run 0 scripts Recently updated (since 2019-02-06): 6 packages (detail see file C:\Users\Administrator.KING\Desktop\webpack\node_modules\.recently_updates.txt) √ All packages installed (292 packages installed from npm registry, used 5s(network 5s), speed 100.79kB/s, json 268(498kB), tarball 0B)
創建文件
cd到app文件夾下創建greeter.js和main.js
$ cd app

$ vi greeter.js

$ vi main.js
?
greeter.js
在Greeter.js中定義一個返回包含問候信息的html元素的函數,并依據CommonJS規范導出這個函數為一個模塊
module.exports = function() {var greet = document.createElement('div');greet.textContent = "小哥哥,快來啊,快活啊";return greet;
};
webpack構建過程??
main.js
main.js文件中我們寫入下述代碼,用以把Greeter模塊返回的節點插入頁面。
const greeter = require('./Greeter.js');
document.querySelector("#root").appendChild(greeter());
?
cd到public下面創建index.html
$ cd ..

$ cd public/
$ vi index.html
webpack菜鳥教程。index.html
其中bundle.js為打包后的js文件名稱
<!DOCTYPE html>
<html lang="en"><head><meta charset="utf-8"><title>Webpack Sample Project</title></head><body><div id='root'></div><script src="bundle.js"></script></body>
</html>
?
打包
這里安裝使用的就是非全局安裝,所以打包也使用非全局打包
$ node_modules/.bin/webpack app/main.js -o public/bundle.js
Hash: c6d5fc7966695da6f6cd
Version: webpack 4.29.3
Time: 358ms
Built at: 2019-02-13 12:54:49
Asset Size Chunks Chunk Names
bundle.js 1.09 KiB 0 [emitted] main
Entrypoint main = bundle.js
[0] ./app/main.js 255 bytes {0} [built]
[1] ./app/Greeter.js 304 bytes {0} [built]WARNING in configuration
The 'mode' option has not been set, webpack will fallback to 'production' for this value. Set 'mode' option to 'development' or 'production' to enable defaults for each environment.
You can also set it to 'none' to disable any default behavior. Learn more: https://webpack.js.org/concepts/mode/
進入public打開index.html即可查看效果
gulp webpack。
?
創建配置文件
在根目錄下創建webpack.config.js文件,主要配置入口文件和打包后文件
module.exports = {entry:  __dirname + "/app/main.js",//已多次提及的唯一入口文件
  output: {path: __dirname + "/public",//打包后的文件存放的地方filename: "bundle.js"//打包后輸出文件的文件名
  }
}
?
注:“__dirname”是node.js中的一個全局變量,它指向當前執行腳本所在的目錄。
webpack loader??
修改greeter.js
就是改了下文字內容~
module.exports = function() {var greet = document.createElement('div');greet.textContent = "We still hava a long way to go.";return greet;
};
重新打包
這時候就很簡單了,當然如果全局安裝的話,直接webpack就可以了
$ node_modules/.bin/webpack
Hash: 9725aade1d1273904ee2
Version: webpack 4.29.3
Time: 364ms
Built at: 2019-02-13 14:19:38Asset     Size  Chunks             Chunk Names
bundle.js  1.1 KiB       0  [emitted]  main
Entrypoint main = bundle.js
[0] ./app/main.js 255 bytes {0} [built]
[1] ./app/Greeter.js 314 bytes {0} [built]WARNING in configuration
The 'mode' option has not been set, webpack will fallback to 'production' for this value. Set 'mode' option to 'development' or 'production' to enable defaults for each environment.
You can also set it to 'none' to disable any default behavior. Learn more: https://webpack.js.org/concepts/mode/
webpack阮一峰?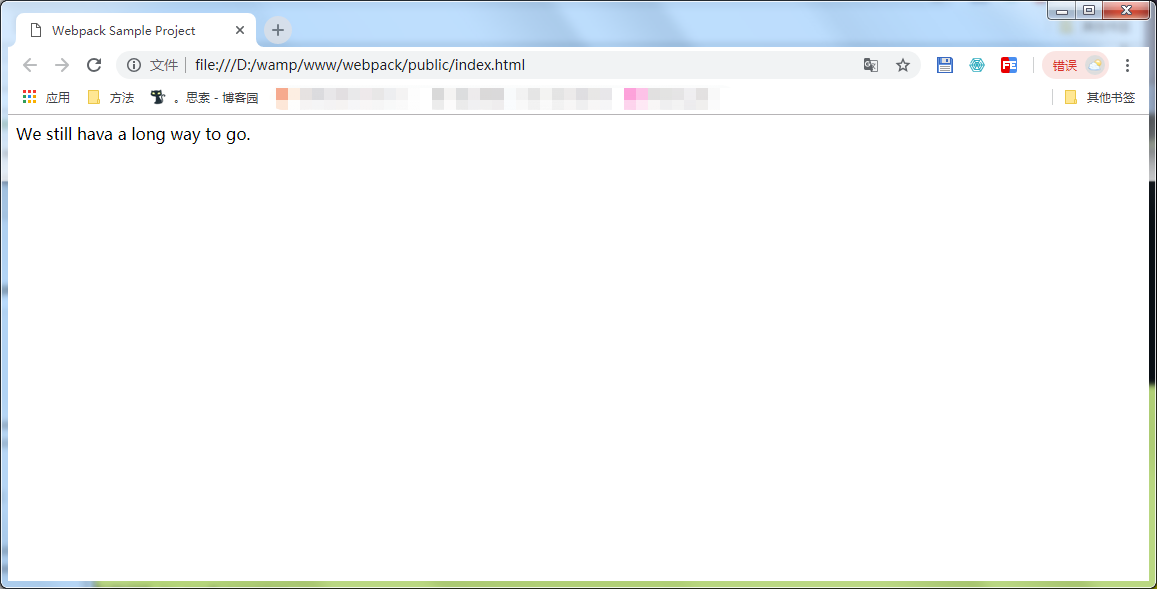
?
自定義打包命令
對npm進行配置后可以在命令行中使用簡單的npm start命令來替代上面略微繁瑣的命令。在package.json中對scripts對象進行相關設置
如果沒有這個package.json文件不要慌,直接npm init初始化一個就可以了,現在開始配置。
反正是測試不發布的,所以可以直接回車即可。
$ npm init
webpack功能。打開package.json修改scripts對象添加以下內容
我這里是非全局安裝所有添加的是node_modules/.bin/webpack,全局安裝的直接添加webpack即可
"start":"node_modules/.bin/webpack"
完整的json文件如下
{"name": "webpack","version": "1.0.0","description": "","main": "webpack.config.js","dependencies": {"webpack-cli": "^3.2.3","webpack": "^4.29.3"},"devDependencies": {},"scripts": {"test": "echo \"Error: no test specified\" && exit 1","start":"node_modules/.bin/webpack"  },"author": "","license": "ISC"
}
再次修改greeter.js
module.exports = function() {var greet = document.createElement('div');greet.textContent = "Hello world";return greet;
};
使用自定義的命令打包
$ npm start> webpack@1.0.0 start D:\wamp\www\webpack
> webpackHash: 1b28a19fd8d2277de6f0
Version: webpack 4.29.3
Time: 376ms
Built at: 2019-02-13 14:31:57Asset      Size  Chunks             Chunk Names
bundle.js  1.08 KiB       0  [emitted]  main
Entrypoint main = bundle.js
[0] ./app/main.js 255 bytes {0} [built]
[1] ./app/Greeter.js 294 bytes {0} [built]WARNING in configuration
The 'mode' option has not been set, webpack will fallback to 'production' for this value. Set 'mode' option to 'development' or 'production' to enable defaults for each environment.
You can also set it to 'none' to disable any default behavior. Learn more: https://webpack.js.org/concepts/mode/
前端webpack、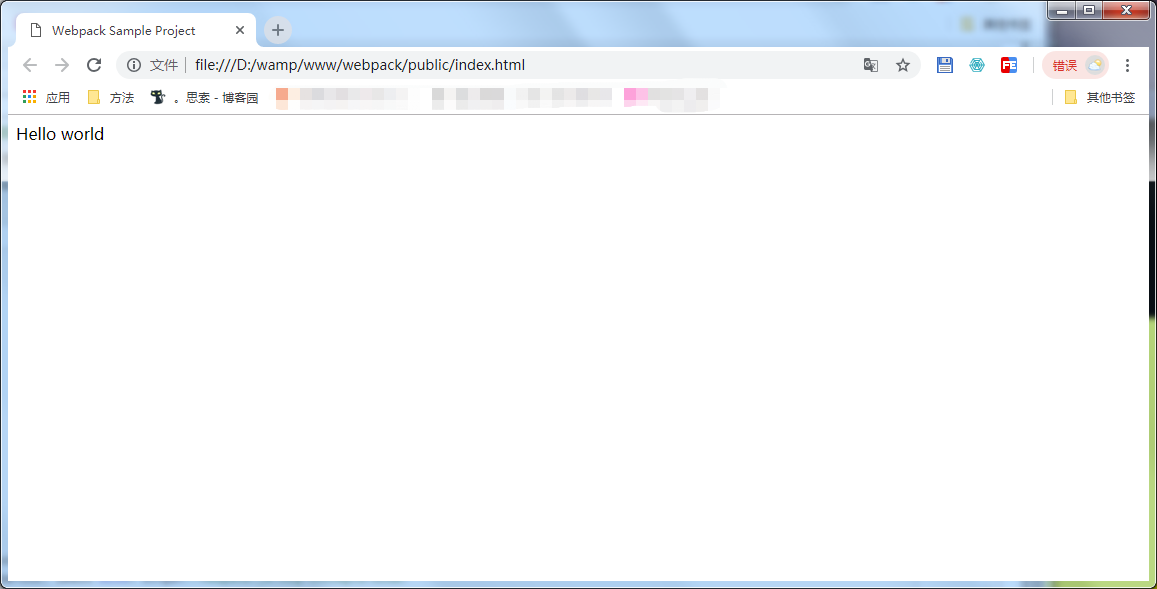
其中有個關于npm的小知識,需要各位到原文去查看,畢竟我們也是從人家那邊學習,不給贊賞給給訪問也可以啊
?
生成Source Maps
webpack的配置文件中配置source maps,需要配置devtool,它有以下四種不同的配置選項,各具優缺點,描述如下:
| devtool選項 | 配置結果 |
|---|---|
source-map | 在一個單獨的文件中產生一個完整且功能完全的文件。這個文件具有最好的source map,但是它會減慢打包速度; |
cheap-module-source-map | 在一個單獨的文件中生成一個不帶列映射的map,不帶列映射提高了打包速度,但是也使得瀏覽器開發者工具只能對應到具體的行,不能對應到具體的列(符號),會對調試造成不便; |
eval-source-map | 使用eval打包源文件模塊,在同一個文件中生成干凈的完整的source map。這個選項可以在不影響構建速度的前提下生成完整的sourcemap,但是對打包后輸出的JS文件的執行具有性能和安全的隱患。在開發階段這是一個非常好的選項,在生產階段則一定不要啟用這個選項; |
cheap-module-eval-source-map | 這是在打包文件時最快的生成source map的方法,生成的Source Map?會和打包后的JavaScript文件同行顯示,沒有列映射,和eval-source-map選項具有相似的缺點; |
上述選項由上到下打包速度越來越快,不過同時也具有越來越多的負面作用,較快的打包速度的后果就是對打包后的文件的的執行有一定影響。
webpack構建流程步驟。對小到中型的項目中,eval-source-map是一個很好的選項,再次強調你只應該開發階段使用它,我們繼續對上文新建的webpack.config.js,進行如下配置:
module.exports = {devtool: 'eval-source-map',entry: __dirname + "/app/main.js",output: {path: __dirname + "/public",filename: "bundle.js"}
}
可能有的同學一直看到了這個警告
WARNING in configuration
The 'mode' option has not been set, webpack will fallback to 'production' for this value. Set 'mode' option to 'development' or 'production' to enable defaults for each environment.
You can also set it to 'none' to disable any default behavior. Learn more: https://webpack.js.org/concepts/mode/
這是什么呢,因為我們沒有在webpack.config.js中配置模式造成了,我們順手也配置下吧
development 開發環境
production 生產環境
module.exports = {mode:'development',devtool: 'eval-source-map',entry: __dirname + "/app/main.js",output: {path: __dirname + "/public",filename: "bundle.js"}
}
?
構建本地服務器
可以讓瀏覽器監聽你的代碼的修改,并自動刷新顯示修改后的結果
$ cnpm install --save-dev webpack-dev-server
platform unsupported webpack-dev-server@3.1.14 ? chokidar@2.1.1 ? fsevents@^1.2.7 Package require os(darwin) not compatible with your platform(win32)
[fsevents@^1.2.7] optional install error: Package require os(darwin) not compatible with your platform(win32)
√ Installed 1 packages
√ Linked 429 latest versions
√ Run 0 scripts
Recently updated (since 2019-02-06): 7 packages (detail see file D:\wamp\www\webpack\node_modules\.recently_updates.txt)
√ All packages installed (472 packages installed from npm registry, used 19s(network 19s), speed 43.94kB/s, json 430(799.49kB), tarball 36.44kB)
webpack的構建流程?修改配置文件webpack.config.js
module.exports = {mode:'development',devtool: 'eval-source-map',entry: __dirname + "/app/main.js",output: {path: __dirname + "/public",filename: "bundle.js"},devServer: {contentBase: "./public",//本地服務器所加載的頁面所在的目錄historyApiFallback: true,//不跳轉inline: true//實時刷新
  }
}
在package.json中的scripts對象中添加如下命令,用以開啟本地服務器:
{"name": "webpack","version": "1.0.0","description": "","main": "webpack.config.js","dependencies": {"webpack-cli": "^3.2.3","webpack": "^4.29.3"},"devDependencies": {"webpack-dev-server": "^3.1.14"},"scripts": {"test": "echo \"Error: no test specified\" && exit 1","start": "node_modules/.bin/webpack","server": "webpack-dev-server --open"},"author": "","license": "ISC"
}
運行服務
$ npm run server> webpack@1.0.0 server D:\wamp\www\webpack
> webpack-dev-server --openi 「wds」: Project is running at http://localhost:8081/
i 「wds」: webpack output is served from /
i 「wds」: Content not from webpack is served from ./public
i 「wds」: 404s will fallback to /index.html
i 「wdm」: wait until bundle finished: /
i 「wdm」: Hash: a3f5179d4ce1ace1f048
Version: webpack 4.29.3
Time: 744ms
Built at: 2019-02-13 14:56:40Asset     Size  Chunks             Chunk Names
bundle.js  867 KiB    main  [emitted]  main
Entrypoint main = bundle.js
[0] multi ./node_modules/_webpack-dev-server@3.1.14@webpack-dev-server/client?http://localhost:8081 ./app/main.js 40 bytes {main} [built]
[./app/Greeter.js] 294 bytes {main} [built]
[./app/main.js] 255 bytes {main} [built]
[./node_modules/_ansi-html@0.0.7@ansi-html/index.js] 4.16 KiB {main} [built]
[./node_modules/_ansi-regex@2.1.1@ansi-regex/index.js] 135 bytes {main} [built]
[./node_modules/_html-entities@1.2.1@html-entities/index.js] 231 bytes {main} [built]
[./node_modules/_loglevel@1.6.1@loglevel/lib/loglevel.js] 7.68 KiB {main} [built]
[./node_modules/_sockjs-client@1.3.0@sockjs-client/dist/sockjs.js] 180 KiB {main} [built]
[./node_modules/_strip-ansi@3.0.1@strip-ansi/index.js] 161 bytes {main} [built]
[./node_modules/_webpack-dev-server@3.1.14@webpack-dev-server/client/index.js?http://localhost:8081] ./node_modules/_webpack-dev-server@3.1.14@webpack-dev-server/client?http://localhost:8081 7.78 KiB {main} [built]
[./node_modules/_webpack-dev-server@3.1.14@webpack-dev-server/client/overlay.js] 3.58 KiB {main} [built]
[./node_modules/_webpack-dev-server@3.1.14@webpack-dev-server/client/socket.js] 1.05 KiB {main} [built]
[./node_modules/url/url.js] 22.8 KiB {main} [built]
[./node_modules/webpack/hot sync ^\.\/log$] (webpack)/hot sync nonrecursive ^\.\/log$ 170 bytes {main} [built]
[./node_modules/webpack/hot/emitter.js] (webpack)/hot/emitter.js 75 bytes {main} [built]+ 12 hidden modules
i 「wdm」: Compiled successfully.
?

webpack官網??
Loader
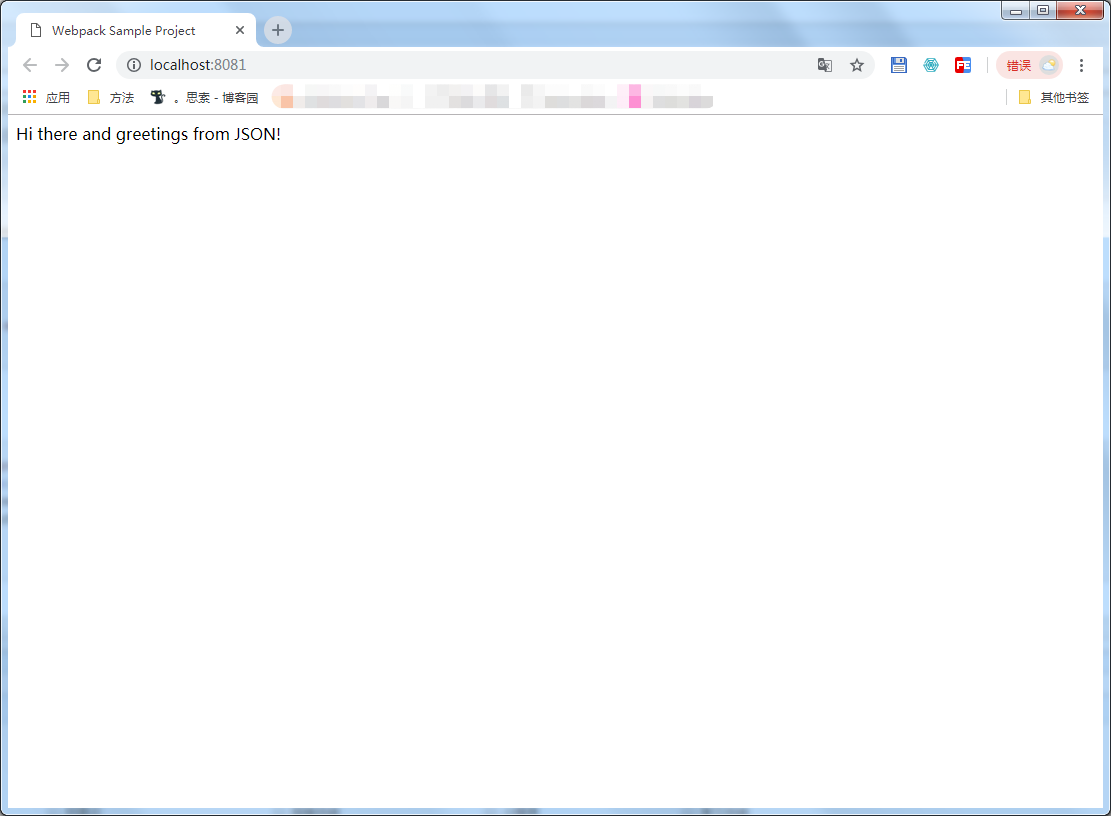
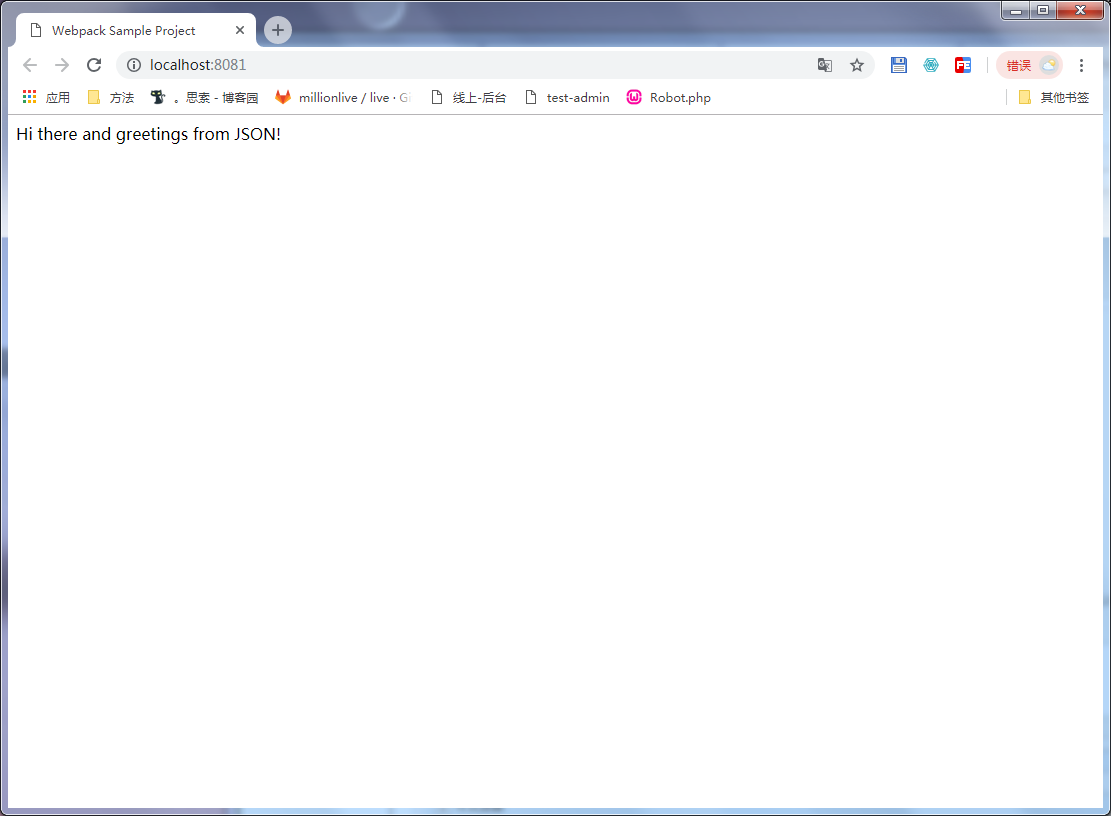
配置loader之前,我們把Greeter.js里的問候消息放在一個單獨的JSON文件里,并通過合適的配置使Greeter.js可以讀取該JSON文件的值,各文件修改后的代碼如下:
在app文件夾下新增一個greet.json文件
greet.json
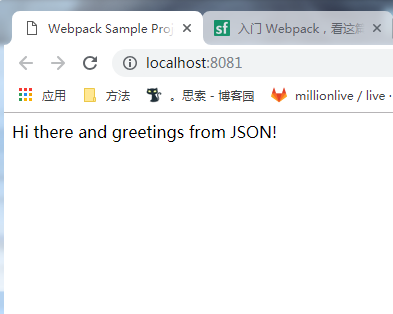
{"greetText": "Hi there and greetings from JSON!"
}
?
webpack使用步驟。greeter.js
var config = require('./greet.json');
module.exports = function() {var greet = document.createElement('div');greet.textContent = config.greetText;;return greet;
};
自動編譯的結果顯示
?
Babel
Babel其實是一個編譯JavaScript的平臺,它可以編譯代碼幫你達到以下目的:
- 讓你能使用最新的JavaScript代碼(ES6,ES7...),而不用管新標準是否被當前使用的瀏覽器完全支持;
- 讓你能使用基于JavaScript進行了拓展的語言,比如React的JSX;
webpack文檔。安裝依賴包
新版本的要求依賴包必須是7的,不然是會報錯的,報錯不可怕,只要看信息總會解決的!
$ cnpm install --save-dev babel-core?babel-loader@7? babel-preset-env babel-preset-react
√ Installed 4 packages
√ Linked 121 latest versions
√ Run 0 scripts
peerDependencies WARNING babel-loader@* requires a peer of @babel/core@^7.0.0 but none was installed
Recently updated (since 2019-02-06): 3 packages (detail see file D:\wamp\www\webpack\node_modules\.recently_updates.txt)
√ All packages installed (113 packages installed from npm registry, used 4s(network 4s), speed 329.85kB/s, json 125(427.86kB), tarball 873.08kB)
配置webpack.config.js文件
module.exports = {mode: 'development',devtool: 'eval-source-map',entry: __dirname + "/app/main.js",output: {path: __dirname + "/public",filename: "bundle.js"},devServer: {contentBase: "./public",historyApiFallback: true,inline: true},module: {rules: [{test: /(\.jsx|\.js)$/,use: {loader: "babel-loader",options: {presets: ["env", "react"]}},exclude: /node_modules/}]}
}
現在你的webpack的配置已經允許你使用ES6以及JSX的語法了。繼續用上面的例子進行測試,不過這次我們會使用React,記得先安裝 React 和 React-DOM
我只想學下webpack你還給我贈送了react......
$ cnpm install --save react react-dom
√ Installed 2 packages
√ Linked 5 latest versions
√ Run 0 scripts
Recently updated (since 2019-02-06): 5 packages (detail see file D:\wamp\www\webpack\node_modules\.recently_updates.txt)
√ All packages installed (5 packages installed from npm registry, used 1s(network 1s), speed 901.37kB/s, json 7(32.33kB), tarball 1.21MB)
接下來我們使用ES6的語法,更新greeter.js并返回一個React組件
import React, {Component} from 'react'
import config from './config.json';class Greeter extends Component{render() {return (<div>{config.greetText}</div>);}
}export default Greeter 修改main.js如下,使用ES6的模塊定義和渲染Greeter模塊
import React from 'react';
import {render} from 'react-dom';
import Greeter from './greeter';render(<Greeter />, document.getElementById('root'));
然后重新打包
$ npm start> webpack@1.0.0 start D:\wamp\www\webpack
> webpackHash: bcd934684f9507b2fc78
Version: webpack 4.29.3
Time: 2240ms
Built at: 2019-02-13 16:13:51Asset      Size  Chunks             Chunk Names
bundle.js  2.16 MiB    main  [emitted]  main
Entrypoint main = bundle.js
[./app/Greeter.js] 5.28 KiB {main} [built]
[./app/greet.json] 58 bytes {main} [built]
[./app/main.js] 1.23 KiB {main} [built]
[./node_modules/webpack/buildin/global.js] (webpack)/buildin/global.js 472 bytes {main} [built]+ 11 hidden modules
分開配置
?雖然可以在webpack.config.js中配置,但是babel的配置項還是很多的,所以我們單獨命名一個.babelrc的配置文件
webpack會自動調用.babelrc的配置文件
webpack.config.js
module.exports = {mode: 'development',devtool: 'eval-source-map',entry: __dirname + "/app/main.js",output: {path: __dirname + "/public",filename: "bundle.js"},devServer: {contentBase: "./public",historyApiFallback: true,inline: true},module: {rules: [{test: /(\.jsx|\.js)$/,use: {loader: "babel-loader",},exclude: /node_modules/}]}
}
.babelrc
{"presets": ["react", "env"]
}
?
plugins
插件(Plugins)是用來拓展Webpack功能的,它們會在整個構建過程中生效,執行相關的任務。
Loaders和Plugins常常被弄混,但是他們其實是完全不同的東西,可以這么來說,loaders是在打包構建過程中用來處理源文件的(JSX,Scss,Less..),一次處理一個,插件并不直接操作單個文件,它直接對整個構建過程其作用。
Webpack有很多內置插件,同時也有很多第三方插件,可以讓我們完成更加豐富的功能。
const webpack = require('webpack'); //引入內置插件
module.exports = {mode: 'development',devtool: 'eval-source-map',entry: __dirname + "/app/main.js",output: {path: __dirname + "/public",filename: "bundle.js"},devServer: {contentBase: "./public",historyApiFallback: true,inline: true},module: {rules: [{test: /(\.jsx|\.js)$/,use: {loader: "babel-loader",},exclude: /node_modules/}]},plugins: [new webpack.BannerPlugin('版權所有,翻版必究')],
}
重新打包
$ npm start> webpack-project@1.0.0 start D:\wamp\www\webpack
> webpackHash: 1f027912d9db7df7db0e
Version: webpack 4.29.3
Time: 1397ms
Built at: 2019-02-14 10:20:36Asset      Size  Chunks             Chunk Names
bundle.js  2.16 MiB    main  [emitted]  main
Entrypoint main = bundle.js
[./app/greet.json] 58 bytes {main} [built]
[./app/greeter.js] 5.39 KiB {main} [built]
[./app/main.js] 1.23 KiB {main} [built]
[./node_modules/webpack/buildin/global.js] (webpack)/buildin/global.js 472 bytes {main} [built]+ 11 hidden modules
?查看bundle.js文件

?
HtmlWebpackPlugin
這個插件的作用是依據一個簡單的index.html模板,生成一個自動引用你打包后的JS文件的新index.html。這在每次生成的js文件名稱不同時非常有用(比如添加了hash值)。$ cnpm install --save-dev html-webpack-plugin √ Installed 1 packages √ Linked 55 latest versions √ Run 0 scripts Recently updated (since 2019-02-07): 1 packages (detail see file D:\wamp\www\webpack\node_modules\.recently_updates.txt) √ All packages installed (54 packages installed from npm registry, used 4s(network 4s), speed 38.09kB/s, json 56(166.11kB), tarball 0B)
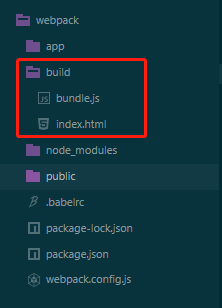
1.移除public文件夾,在根目錄下創建build文件夾,利用此插件,index.html文件會自動生成,此外CSS已經通過前面的操作打包到JS中了。
2.在app目錄下,創建一個index.tmpl.html文件模板,這個模板包含title等必須元素,在編譯過程中,插件會依據此模板生成最終的html頁面,會自動添加所依賴的 css, js,favicon等文件,index.tmpl.html中的模板源代碼如下:
<!DOCTYPE html>
<html lang="en"><head><meta charset="utf-8"><title>Webpack Sample Project</title></head><body><div id='root'></div></body>
</html>
?
更新webpack.config.js配置文件
const webpack = require('webpack'); //引入內置插件
const HtmlWebpackPlugin = require('html-webpack-plugin');
module.exports = {mode: 'development',devtool: 'eval-source-map',entry: __dirname + "/app/main.js",output: {path: __dirname + "/build",filename: "bundle.js"},devServer: {contentBase: "./build",//本地服務器所加載的頁面所在的目錄historyApiFallback: true,//不跳轉inline: true//實時刷新
    },module: {rules: [{test: /(\.jsx|\.js)$/,use: {loader: "babel-loader",},exclude: /node_modules/}]},plugins: [new webpack.BannerPlugin('版權所有,翻版必究'),new HtmlWebpackPlugin({template: __dirname + "/app/index.tmpl.html"//new 一個這個插件的實例,并傳入相關的參數
        })],
}
重新打包,重新編譯
$ npm start> webpack-project@1.0.0 start D:\wamp\www\webpack
> webpackHash: b3fdcd46964738ddb0a3
Version: webpack 4.29.3
Time: 2052ms
Built at: 2019-02-14 10:37:47Asset       Size  Chunks             Chunk Namesbundle.js   2.16 MiB    main  [emitted]  main
index.html  417 bytes          [emitted]
Entrypoint main = bundle.js
[./app/greet.json] 58 bytes {main} [built]
[./app/greeter.js] 5.39 KiB {main} [built]
[./app/main.js] 1.23 KiB {main} [built]
[./node_modules/webpack/buildin/global.js] (webpack)/buildin/global.js 472 bytes {main} [built]+ 11 hidden modules
Child html-webpack-plugin for "index.html":1 assetEntrypoint undefined = index.html[./node_modules/_html-webpack-plugin@3.2.0@html-webpack-plugin/lib/loader.js!./app/index.tmpl.html] 615 bytes {0} [built][./node_modules/webpack/buildin/global.js] (webpack)/buildin/global.js 472 bytes {0} [built][./node_modules/webpack/buildin/module.js] (webpack)/buildin/module.js 497 bytes {0} [built]+ 1 hidden module
$ npm run server
build文件夾中多出兩個文件,頁面顯示正常
?
產品階段的構建
目前為止,我們已經使用webpack構建了一個完整的開發環境。但是在產品階段,可能還需要對打包的文件進行額外的處理,比如說優化,壓縮,緩存以及分離CSS和JS。
對于復雜的項目來說,需要復雜的配置,這時候分解配置文件為多個小的文件可以使得事情井井有條,以上面的例子來說,我們創建一個webpack.production.config.js的文件,在里面加上基本的配置,它和原始的webpack.config.js很像,如下
onst webpack = require('webpack'); //引入內置插件
const HtmlWebpackPlugin = require('html-webpack-plugin');
module.exports = {mode: 'production', //模式修改了devtool: 'null',//修改為null壓縮打包代碼entry: __dirname + "/app/main.js",output: {path: __dirname + "/build",filename: "bundle.js"},devServer: {contentBase: "./build",//本地服務器所加載的頁面所在的目錄historyApiFallback: true,//不跳轉inline: true//實時刷新
    },module: {rules: [{test: /(\.jsx|\.js)$/,use: {loader: "babel-loader",},exclude: /node_modules/}]},plugins: [new webpack.BannerPlugin('版權所有,翻版必究'),new HtmlWebpackPlugin({template: __dirname + "/app/index.tmpl.html"//new 一個這個插件的實例,并傳入相關的參數
        })],
}
?
package.json
?
{"name": "webpack-project","version": "1.0.0","description": "","main": "webpack.config.js","dependencies": {"react": "^16.8.1","react-dom": "^16.8.1","webpack": "^4.29.3","webpack-cli": "^3.2.3"},"devDependencies": {"babel-core": "^6.26.3","babel-loader": "^7.1.5","babel-preset-env": "^1.7.0","babel-preset-react": "^6.24.1","html-webpack-plugin": "^3.2.0","webpack-dev-server": "^3.1.14"},"scripts": {"test": "echo \"Error: no test specified\" && exit 1","start": "node_modules/.bin/webpack","server": "webpack-dev-server --open","build": "set NODE_ENV=production && webpack --config ./webpack.production.config.js --progress" //windows},"author": "","license": "ISC"
}
優化插件
webpack提供了一些在發布階段非常有用的優化插件,它們大多來自于webpack社區,可以通過npm安裝,通過以下插件可以完成產品發布階段所需的功能
OccurenceOrderPlugin?:為組件分配ID,通過這個插件webpack可以分析和優先考慮使用最多的模塊,并為它們分配最小的IDUglifyJsPlugin:壓縮JS代碼; //此插件已經不能使用ExtractTextPlugin:分離CSS和JS文件? //extract-text-webpack-plugin目前版本不支持webpack4
我們繼續用例子來看看如何添加它們,OccurenceOrder 和 UglifyJS plugins 都是內置插件,你需要做的只是安裝其它非內置插件
$ cnpm install extract-text-webpack-plugin@next
√ Installed 1 packages
√ Linked 12 latest versions
√ Run 0 scripts
Recently updated (since 2019-02-07): 2 packages (detail see file D:\wamp\www\webpack\node_modules\.recently_updates.txt)
√ All packages installed (5 packages installed from npm registry, used 2s(network 2s), speed 62.08kB/s, json 13(97.33kB), tarball 12.91kB)
修改webpack.production.config.js
/*
* @Author: wyy
* @Date:   2019-02-14 10:45:50
* @Email:  2752154874@qq.com
* @Last Modified by:   wyy
* @Last Modified time: 2019-02-14 10:49:01
*/
const webpack = require('webpack'); //引入內置插件
const HtmlWebpackPlugin = require('html-webpack-plugin');
const ExtractTextPlugin = require('extract-text-webpack-plugin');
module.exports = {mode: 'production',devtool: 'null',//修改為null壓縮打包代碼entry: __dirname + "/app/main.js",output: {path: __dirname + "/build",filename: "bundle.js"},devServer: {contentBase: "./build",//本地服務器所加載的頁面所在的目錄historyApiFallback: true,//不跳轉inline: true//實時刷新
    },module: {rules: [{test: /(\.jsx|\.js)$/,use: {loader: "babel-loader",},exclude: /node_modules/}]},plugins: [new webpack.BannerPlugin('版權所有,翻版必究'),new HtmlWebpackPlugin({template: __dirname + "/app/index.tmpl.html"//new 一個這個插件的實例,并傳入相關的參數
        }),new webpack.optimize.OccurrenceOrderPlugin(),new ExtractTextPlugin("style.css")],
}
?進行編譯
$ npm run build> webpack-project@1.0.0 build D:\wamp\www\webpack
> set NODE_ENV=production && webpack --config ./webpack.production.config.js --progressHash: c9e8a924b38580a073b8
Version: webpack 4.29.3
Time: 3371ms
Built at: 2019-02-14 11:26:04Asset       Size  Chunks             Chunk Namesbundle.js    117 KiB       0  [emitted]  main
index.html  417 bytes          [emitted]
Entrypoint main = bundle.js[2] ./app/main.js 1.23 KiB {0} [built][8] (webpack)/buildin/global.js 472 bytes {0} [built][9] ./app/greeter.js 5.39 KiB {0} [built]
[10] ./app/greet.json 58 bytes {0} [built]+ 7 hidden modules
Child html-webpack-plugin for "index.html":1 assetEntrypoint undefined = index.html[0] ./node_modules/_html-webpack-plugin@3.2.0@html-webpack-plugin/lib/loader.js!./app/index.tmpl.html 615 bytes {0} [built][2] (webpack)/buildin/global.js 472 bytes {0} [built][3] (webpack)/buildin/module.js 497 bytes {0} [built]+ 1 hidden module
?
?
最后附上本文的demo
https://github.com/wangyang0210/bky/tree/webpack